

I've been asked a lot about the Toy Camera I made for AJ last week. The one I made for him was out of black felt. It is cute for toddlers but not really safe for babies (who are still chewing on everything). So I made a cute fabric version and I'm including a tutorial for you all to try it out!

You will need:
- 1/4 yard of fabric
- embroidery floss
- plastic vinyl (I cut up an old cosmetic bag and used that)
- needle and thread
- polyfiber stuffing

Optional embellishments:
- felt
- buttons
- ribbon (this is for the strap if you don't want to make your own)
First you're going to cut up your pieces. From your main fabric, you will need:
- Front and back: 4” by 5”
- Top and bottom: 5” by 2”
- Sides: 4” by 2"
- Lens: 2.5” by 7.5”
- Lens top: 1 circles 2.5” diameter

Cut the plastic vinyl into a 3" by 2.25" rectangle.
If you're adding felt details, you will need to cut these pieces out of your felt:
- Controls: 1 circle 1” diameter, 1 circle 3/4” diameter
- Picture Viewer: 2" by 1"
If you're making your own strap, you will need to cut a 30" by 2.5" piece out of the same fabric or you can choose to use a contrasting fabric.

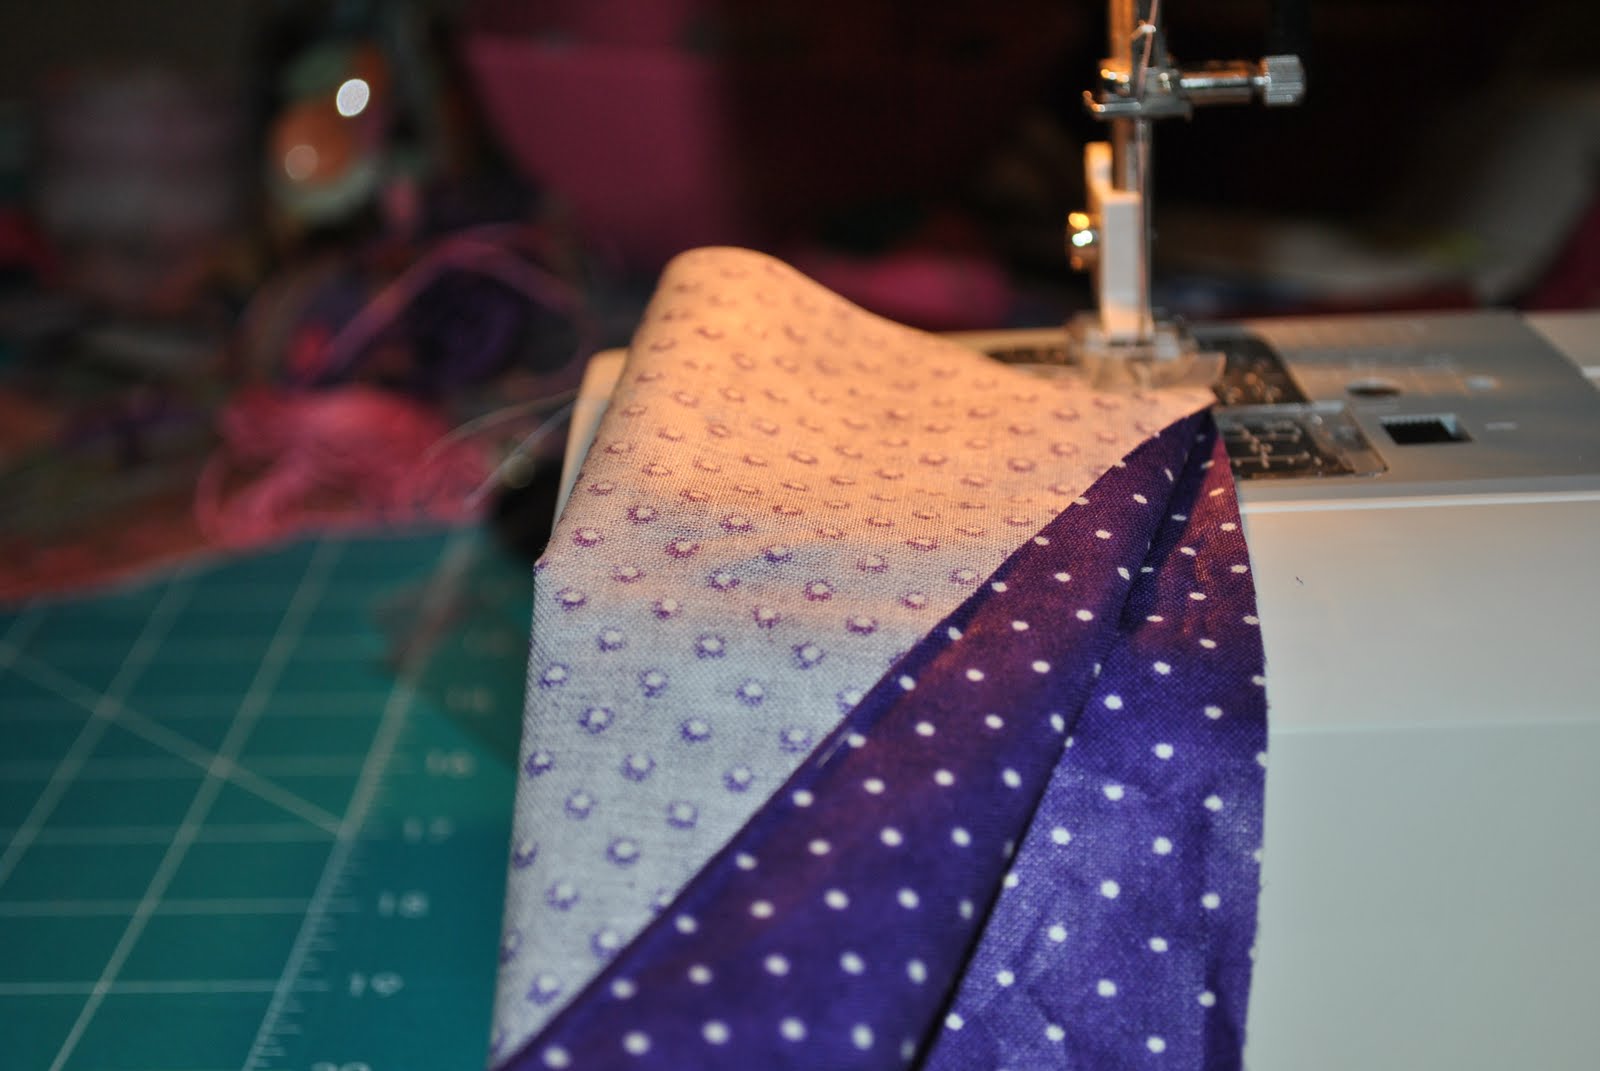
Ok, so start by sewing the felt pieces onto the back piece of fabric. I hand-sewed the vinyl with embroidery floss. It's easier and it looks pretty! Your back piece should look like this.


Sew along the edge using a 1/2" seam allowance to create a circle.

Pin the circle onto the lens, wrong sides together.

Now sew along the circle using a 1/8" seam allowance.

Turn the lens right side out. It should look like this.

Stuff the lens about halfway with polyfiber stuffing and then pin closed.

Using your needle and thread, sew the lens onto the front of the camera.

With your embroidering floss, stitch some details onto the front of the camera. I wrote Nikon on top of the lens and added a little flash circle next to it. You can write Canon if you prefer that brand :)

Now let's make the strap. You can skip this part if you're using ribbon.
Fold your strap piece halfway, wrong sides together, length wise. Sew along the raw edges using a 1/4" seam allowance.
Turn the strap inside out and press. I had made a thicker strap in these pictures and then ended up replacing it with a thinner one, so hopefully you don't get confused with the pictures. Your strap should look a lot skinnier than the one you're seeing here.
It's time to assemble your pieces. Layer the back of your camera (right side up), the camera strap, and one of the sides (face down) like this


Now sew the top and bottom pieces onto the back. Then sew them onto the sides.

Sew a button onto the top panel. Turn this assembled piece inside out and stuff the strap into it. Place the front side of the camera on top of it, wrong side up. Make sure the top of the front piece is parallel to the top side of the back piece.

Sew along the entire perimeter using a 1/4" seam allowance and remember to leave a 3" opening on the bottom to turn inside out.


Top stitch the opening and you're done!!! Cut up a cute photo and slip it into the "LED screen".


Hope I didn't lose you guys along the way. Now you can make all the little cameras you want for your kids and your friends' kids. I guarantee they will make wonderful gifts. And if you don't feel like making them, head on over to my etsy shop. I'll be putting this little camera up for sale! Enjoy :)
This is so super cute. I've never seen anything like this. Thanks for the tutorial. I am your latest follower. I would love for you to come and check out my blog and follow me back at www.diybydesign.blogspot.com. Thanks so much.
ReplyDeleteOh my gosh.. that is so sweet!!! I love the picture of the baby on the back too. What a fun idea!
ReplyDeleteI'd love to have you share this at my For the Kids Friday Link Party, going on now at SunScholars. Come join in on the fun!
http://sunscholars.blogspot.com/2011/03/for-kids-friday-4.html
Hello! This is TheArtistChick from swap bot. What a lovely project! I am now following your blog and I will enjoy catching up with your posts!
ReplyDeleteSo cute! My kids would love something like this. I love the added touch of the photograph on the back. My 2yr old always runs towards me and says "eh me see" after I take ANY photos of him.
ReplyDeleteThanks for sharing this post at For the Kids Friday at Sun Scholars. This week's party is now posted. I'd love to have you share with us again this week!
ReplyDeletehttp://sunscholars.blogspot.com/2011/03/for-kids-friday-5.html
this is oh so cute and oh so pretty! thanks for sharing and linking up!
ReplyDeleteThat is SOOOO cute!! I linked to your tutorial on Craft Gossip Sewing:
ReplyDeletehttp://sewing.craftgossip.com/tutorial-camera-softie/2011/07/09/
--Anne
made an orange cannon! :D
ReplyDeletehttp://froginstitches.blogspot.com/2011/07/diy-camera-softie.html?showComment=1311609401766#c1268921150377309455
made a couple of changes.
good tutorial!
Oh my goodness!! I am pinning this one! I am a wedding photographer and LOVE this! I really want to make one for my kids now! :-) Thanks for sharing!
ReplyDeleteSo marvelous.See if you could learn something from stitch toys sale to improve your skill. Thank you
ReplyDeleteTwo full thumbs up for this magneficent article of yours. I've really enjoyed reading this article today and I think this might be one of the best article that I've read yet. Please, keep this work going on in the same quality. double sided fusible interfacing
ReplyDeleteI found Hubwit as a transparent s ite, a social hub which is a conglomerate of Buyers and Sellers who are ready to offer online digital consultancy at decent cost. virtual assistant
ReplyDeleteWriting with style and getting good compliments on the article is quite hard, to be honest.But you've done it so calmly and with so cool feeling and you've nailed the job. This article is possessed with style and I am giving good compliment. Best! Sport car
ReplyDelete