
My son has been using his Crayon Roll practically everyday. It's so easy to keep track of his crayons here and his chubby little fingers can easily slip the crayons back into their little pockets. He was not able to do this with the boxes or packets that the crayons usually come in. For some reason, coloring just seems a hundred times for fun with crayon rolls! Everytime my neice comes over, she asks to borrow it. She absolutely loves it. So, I made one of her very own!


I took pictures along the way so you can make one too! This tutorial is for mini Crayola Twistables, but you can easily change things around to accomodate regular crayons, paint brushes, pens, highlighters, whatever you want!
This is what you'll need:

- Two coordinating fabrics
- Matching ribbon
- Rotary cutter and cutting mat
Now you're going to cut your fabric as follows.

Main Fabric:
(1) 17" by 6" rectangle
(1) 17" by 8" rectangle
Lining Fabric:
(1) 17" by 6" rectangle
Fold your 17" by 8" fabric piece in half length-wise and press.

Using a 1/4" seam allowance, top stitch along the folded edge.

Now place this piece over your lining piece, raw edges together. Machine baste, as close to the edges as possible.

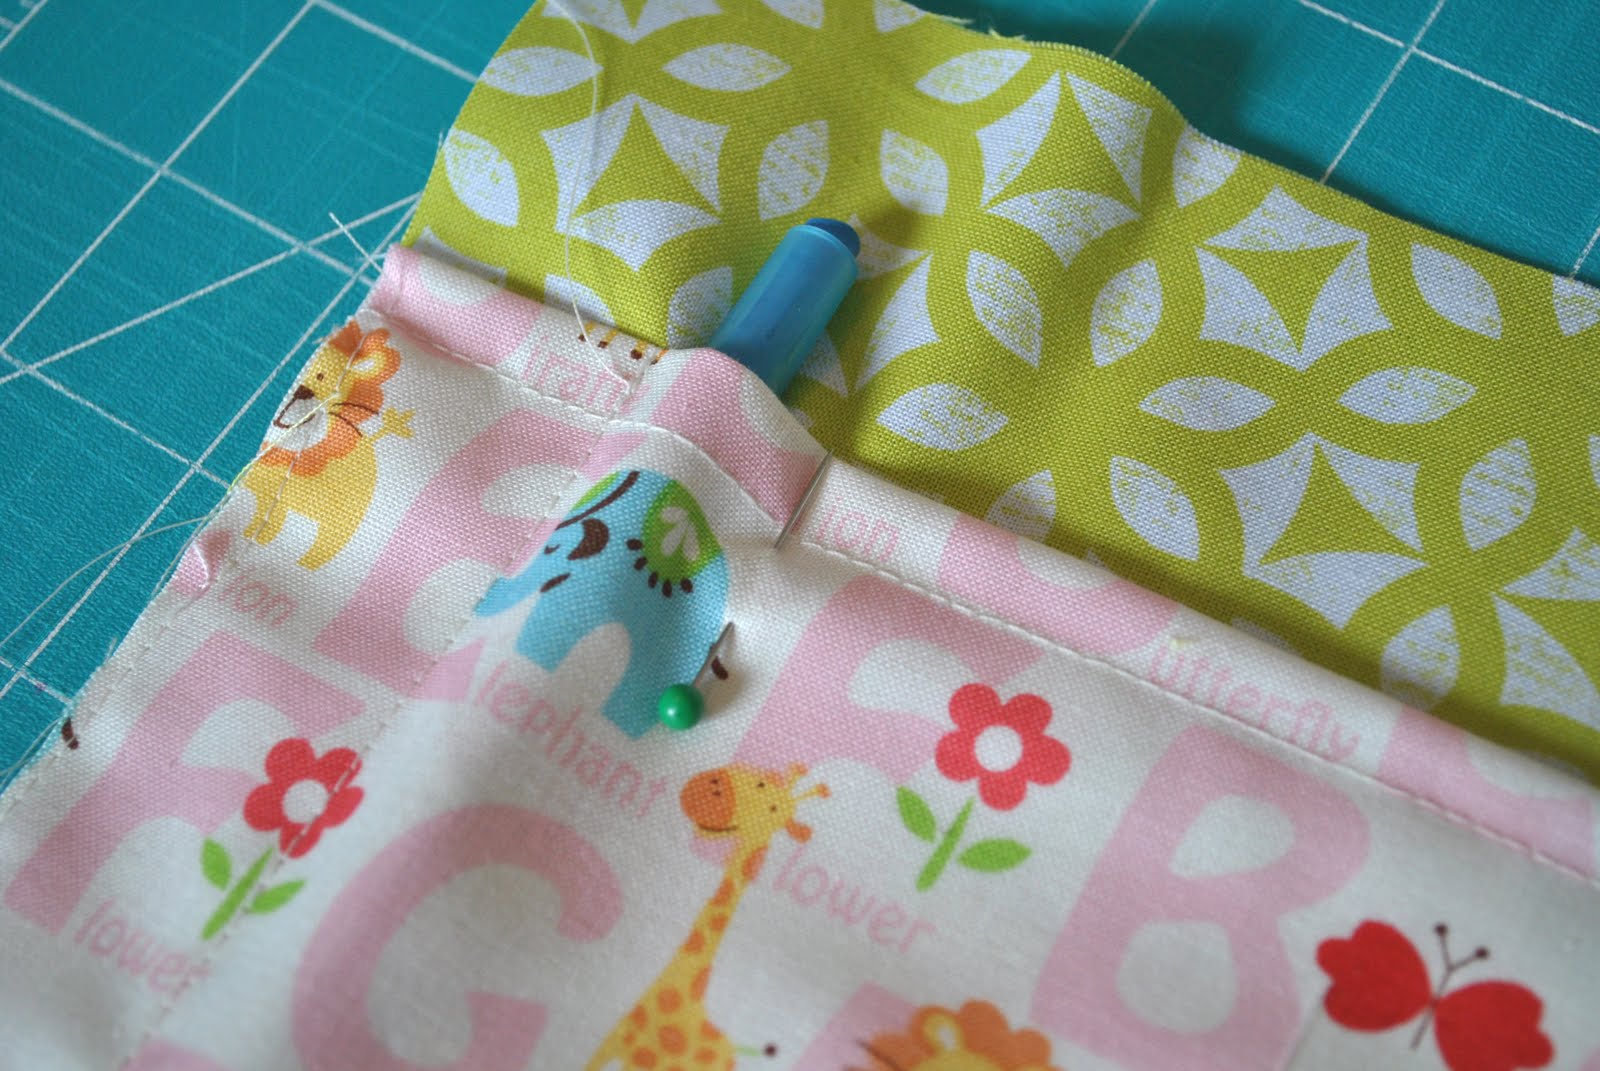
Grab your crayon, paint brush, or whatever you're using and place it inside the pocket near the edge. Leave about 1/4" on the very edge for seam allowance later. Place a pin on your stitch line.

Stitch a straight line from the pin down. Don't forget to backstitch at the beginning and end of the line.

Place the crayon on the right side of the newly stitched line and this time place the pin as snug to the crayon as you can. Remove the crayon and stitch a line from the pin again.
Place the crayon back into the pocket to make sure it fits.

I measured about 1" from line to line. So place more pins all the way across, one inch apart (or whatever your measurement was). And then finish sewing your lines/pockets.

Now get your 17" by 6" main fabric and place it right side up on the table. Cut two strands of ribbon about 20" long. Overlap the tips and center them to one side of your main fabric. Pin in place.

Fold your ribbon to the center so you don't accidently sew it when you're assembling your pieces.

Get your lining with pockets and place right side down over the ribbon and main fabric piece. Make sure to alight top with top and bottom with bottom. Pin in place. Sew along the edges using a 1/4" seam allowance, leaving a 3" opening on the top center.

Clip your corners and turn right side out.

Press and top stitch along the edges. You can slip stitch your opening first but I didn't because I top stitched really close to the edges. And you're done!

This crayon roll fits approximately 17 Crayola Twistable Minis. Again, you can adjust the measurements to fit more or less if you want.


I hope this was helpful! Feel free to comment or email me if you have any questions. I will be more than happy to help!! Thank you guys for stopping by! Don't forget to vote for my Fabric Basket here. I'm up for Best of May Projects!
cute and so simple!
ReplyDeleteOh my gosh! I love it! Thanks for the tutorial! When I finally get a sewing maching I'll have to make one of these!!
ReplyDeleteAwesome tutorial! I love it! Love your fabrics too!
ReplyDeleteI would love to have you share this at my For the Kids link party! Come join the fun!
http://sunscholars.blogspot.com/2011/05/for-kids-friday-9.html
So cute! I've been off my computer for several days now, and trying to catch up on everything people have been working on...this one is definitely fun and adorable!
ReplyDeleteLove the change in your site design too. Looks great!
so girly! i love it.
ReplyDeleteThis is a great tutorial! Super handy and cute! Please stop by www.laughloveandcraft.com and link up to my Share the Wealth Wednesday Link Party! I'm your newest follower!
ReplyDeleteThis is sooo adorable! I love the tutorial.. as a new sewing diva.. I need all the help I can get! Thanks so much for sharing with the Pink Hippo Party.. can't wait to see what you share next week!
ReplyDeleteOh I love this!! Maybe just maybe my son would be more inclined to put his crayons away without being asked 50 times! haha.
ReplyDeletewould love for you to share at my party!!http://www.cherishedbliss.com/2011/05/craft-and-tell-tuesday-no-5-and-new.html
Great idea. I think I'll be adapting it to a make-up brush roll for myself. Thanks for the tutorial.
ReplyDeletei NEED one of these. I have a blog post about this coming soon ;)
ReplyDeleteWhat an awesome project! I would love for you to link your project at Color Chic for a chance to win a giveaway!
ReplyDeleteSo cute! I am making one as a birthday present to one of my daughter's friend ^^)
ReplyDeletethese are so darling:)
ReplyDeleteThey are adorable and I love the fabric your chose too! Thanks for linking up with Fun for Kids Friday!
ReplyDeleteI am an art teacher and these will be great for in the class room too. i have pinned this on my Pinterest boards for future reference. Thanks for sharing. Next time you are blog hopping i hope you can come over and see what i do :)
ReplyDeleteLynda @ www.ubersavvy.blogspot.com
Do you have any recommendations to make a colored pencil roll?
ReplyDeleteevilmangoeater (at) gmail (dot) com